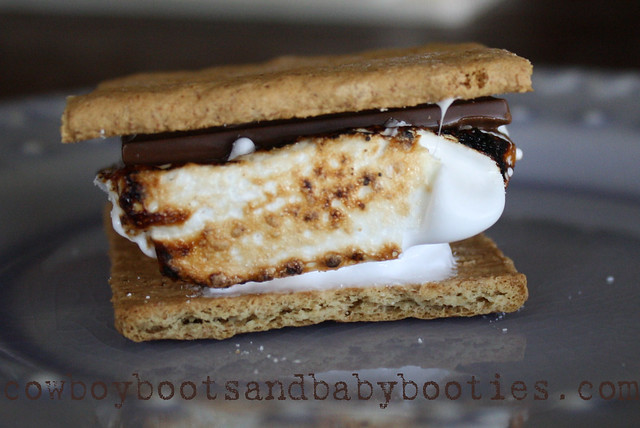
Mushy Smushy Goodness

It wasn't hard at all just totally messy and gooey.
*Tip...have a sink full of hot super hot soapy water ready to drop pans in. No scrubbing just let it melt off. Makes clean up so much easier.
I wish I had pictures of me making this...you would have laughed as hard as I was. The goo really does put up a fight and I nearly gave up. But I'm determined to make this again and keep perfecting it....I'm thinking peppermint, or maybe strawberry, or chocolate. Hello sticky goodness.
I used the recipe over at ourbestbites.com
Recipe
3 packets unflavored gelatin
1 C ice water, divided
1 1/2 C sugar
1 C light corn syrup
1/4 teaspoon kosher salt
1 teaspoon vanilla extract
1/4 C corn starch
1/4 C powdered sugar
9 x 13″ pan
non stick spray
Place the contents of the gelatin packets into the bowl of a stand mixer. (Yes, you’ll want a stand mixer, or someone to trade off holding a hand mixer with you- but don’t blame me if you blow out the motor of your hand mixer, you’ve been warned!) Add 1/2 C of the ice water.
Stir gently to combine and then set that bowl aside.
In a small saucepan combine: remaining 1/2 C water, corn syrup, granulated sugar, and salt. Stir mixture to combine and bring it to a boil. Reduce to a simmer and then clip a candy thermometer onto the pan. And seriously, if you don’t have a candy thermometer you can grab one for less than 3 bucks at Walmart or even sometimes in the baking isle at the grocery store. It’s well worth the little investment!
The sugar mixture needs to remain on a simmer and come to a temperature of 245 degrees F. It may take 20 minutes or so, so just stir the mixture every once and a while and keep an eye on the temp.
After the mixture reaches 245 degrees, remove from heat. This is where you need to be very careful so you don’t end up cursing my name while treating the third degree burns on your forearms. While your mixer runs on low speed, you need to slowly pour the sugar mixture into the bowl with the gelatin. Now I don’t know about you, but half the time when I try to pour something directly out of a pan (especially when I’m trying to pour slowly) it ends up spilling down the side of the pan and off the bottom and onto the counter, etc. So I choose to dirty one more dish and ladle the sugar mixture into something with a pour spout,
After you add the entire sugar mixture to the gelatin turn the beater speed up to med-high. Continue to whip for 12-15 minutes, adding the vanilla in the last few minutes of beating.
*Also, immediately put your sticky pan and utensils from the sugar mixture into very hot, soapy water. The quicker you get it soaking the quicker the goo will come off!
While your sugar goo is magically transforming into soft, fluffy marshmallows, prepare your pan.
Combine the cornstarch and powdered sugar in a small bowl. Spray a 9 x 13″ pan with non stick spray and coat the bottom and sides with the cornstarch mixture. Tap excess out and save it.
When your marshmallows are done beating the mixture should be thick and white and luke warm,
It’s kind of like jarred marshmallow cream at this point. (Mine was more sticky...I'm gonna decrease the mix time next time to 8 mins)
Grab a spatula and scrape the marshmallow mixture into the prepared pan. The stuff is sticky and gooey and it might put up a fight. Show it who’s boss. And don’t worry about getting every last gooey drop because you won’t! Just pull out what you can and then immediately put that dirty dish in the sink with hot soapy water. I found it helpful to spray my spatula with non-stick spray.
Once the marshmallow mixture is all in the pan you’ll need to spread it out. A lot of recipes tell you to dip an angled knife into cold water first, but I found it much easier to spray the back of a large spoon with non-stick spray and spread it that way. It will be kind of lumpy, but just keep spraying and patting and get it as smooth as you can. (I sprayed my fingers w/pam and used my good ol counting tools)

I lined my pan with parchment paper and then put another layer on top too. (then I wrapped in plastic wrap for overnight)
Let the pan sit at room temp for about an hour (to form a dry layer on the top) and sprinkle a couple spoonfuls of the corn starch mixture over the top. Cover with a sheet of plastic wrap and let it sit overnight. Technically, you could cut the marshmallows after 4-5 hours, but I think they work better after sitting overnight. (I agree)
When they’re ready to cut, just pull the marshmallowy sheet out of the pan. It should pop right out. The bottom side will be much nicer looking than the top side!
I used a pizza cutter and cut mine into cubes. Worked just fine!

Once they are cut, dust each marshmallow lightly with the remaining cornstarch mixture. This makes them easy to handle and keeps them from sticking together.

I can't wait to try this again!


Comments